RxJS Tutorial
This chapter deals with information about features, advantages and disadvantages of RxJS. Here, we will also learn when to use RxJS.
The full form of RxJS is Reactive Extension for Javascript. It is a javascript library that uses observables to work with reactive programming that deals with asynchronous data calls, callbacks and event-based programs. RxJS can be used with other Javascript libraries and frameworks. It is supported by javascript and also with typescript.
What is RxJS?
As per the official website of RxJS, it is defined as a library for composing asynchronous and event-based programs by using observable sequences. It provides one core type, the Observable, satellite types (Observer, Schedulers, Subjects) and operators inspired by Array#extras (map, filter, reduce, every, etc.) to allow handling asynchronous events as collections.
Features of RxJS
In RxJS, the following concepts takes care of handling the async task −
Observable
An observable is a function that creates an observer and attaches it to the source where values are expected, for example, clicks, mouse events from a dom element or an Http request, etc.
Observer
It is an object with next(), error() and complete() methods, that will get called when there is interaction to the with the observable i.e. the source interacts for an example button click, Http request, etc.
Subscription
When the observable is created, to execute the observable we need to subscribe to it. It can also be used to cancel the execution.
Operators
An operator is a pure function that takes in observable as input and the output is also an observable.
Subject
A subject is an observable that can multicast i.e. talk to many observers. Consider a button with an event listener, the function attached to the event using addlistener is called every time the user clicks on the button similar functionality goes for subject too.
Schedulers
A scheduler controls the execution of when the subscription has to start and notified.
When to use RxJS?
If your project consists of lots of async task handling than RxJS is a good choice. It is loaded by default with the Angular project.
Advantages of using RxJS
The following are the advantages of using RxJS −
-
RxJS can be used with other Javascript libraries and frameworks. It is supported by javascript and also with typescript. Few examples are Angular, ReactJS, Vuejs, nodejs etc.
-
RxJS is an awesome library when it comes to the handling of async tasks.RxJS uses observables to work with reactive programming that deals with asynchronous data calls, callbacks and event-based programs.
-
RxJS offers a huge collection of operators in mathematical, transformation, filtering, utility, conditional, error handling, join categories that makes life easy when used with reactive programming.
Disadvantages of using RxJS
The following are the disadvantages of using RxJS −
-
Debugging the code with observables is little difficult.
-
As you start to use Observables, you can end up your full code wrapped under the observables.
RxJS – Environment Setup
In this chapter, we are going to install RxJS. To work with RxJS, we need the following setup −
- NodeJS
- Npm
- RxJS package installation
NODEJS and NPM Installation
It is very easy to install RxJS using npm. You need to have nodejs and npm installed on your system. To verify if NodeJS and npm is installed on your system, try to execute the following command in your command prompt.
E:>node -v && npm -v
v10.15.1
6.4.1
In case you are getting the version, it means nodejs and npm is installed on your system and the version is 10 and 6 right now on the system.
If it does not print anything, install nodejs on your system. To install nodejs, go to the homepage https://nodejs.org/en/download/ of nodejs and install the package based on your OS.
The download page of nodejs will look like the following −

Based on your OS, install the required package. Once nodejs is installed, npm will also be installed along with it. To check if npm is installed or not, type npm –v in the terminal. It should display the version of the npm.
RxJS Package Installation
To start with RxJS installation, first create a folder called rxjsproj/ where we will practice all RxJS examples.
Once the folder rxjsproj/ is created, run command npm init, for project setup as shown below
E:>mkdir rxjsproj
E:>cd rxjsproj
E:
xjsproj>npm init
Npm init command will ask few questions during execution, just press enter and proceed. Once the execution of npm init is done, it will create package.json inside rxjsproj/ as shown below −
rxjsproj/
   package.json
Now you can install rxjs using below command −
npm install ---save-dev rxjs
E:
xjsproj>npm install --save-dev rxjs
npm notice created a lockfile as package-lock.json. You should commit this file.

npm WARN rxjsproj@1.0.0 No description
npm WARN rxjsproj@1.0.0 No repository field.

+ rxjs@6.5.3
added 2 packages from 7 contributors and audited 2 packages in 21.89s
found 0 vulnerabilities
We are done with RxJS installation. Let us now try to use RxJS, for that create a folder src/ inside rxjsproj/
So, now, we will have the folder structure as shown below −
rxjsproj/
   node_modules/
   src/
   package.json
Inside src/ create a file testrx.js, and write the following code −
testrx.js
import { of } from 'rxjs;
import { map } from 'rxjs/operators';

map(x => x * x)(of(1, 2, 3)).subscribe((v) => console.log(`Output is: ${v}`));
When we go to execute the above code in command prompt, using command − node testrx.js, it will display error for import, as nodejs does not know what to do with import.
To make import work with nodejs, we need to install ES6 modules package using npm as shown below −
E:
xjsprojsrc>npm install --save-dev esm
npm WARN rxjsproj@1.0.0 No description
npm WARN rxjsproj@1.0.0 No repository field.

+ esm@3.2.25
added 1 package from 1 contributor and audited 3 packages in 9.32s
found 0 vulnerabilities
Once the package is installed, we can now execute testrx.js file as shown below −
E:
xjsprojsrc>node -r esm testrx.js
Output is: 1
Output is: 4
Output is: 9
We can see the output now, that shows RxJS is installed and ready to use. The above method will help us test RxJS in the command line. In case, you want to test RxJS in the browser, we would need some additional packages.
Testing RxJS in Browser
Install following packages inside rxjsproj/ folder −
npm install --save-dev babel-loader @babel/core @babel/preset-env webpack webpack-cli webpack-dev-server
E:
xjsproj>npm install --save-dev babel-loader
@babel/core @babel/preset-env webpack webpack-cli webpack-dev-server

npm WARN rxjsproj@1.0.0 No description
npm WARN rxjsproj@1.0.0 No repository field.
npm WARN optional SKIPPING OPTIONAL DEPENDENCY: fsevents@1.2.9
(node_modulessevents):
npm WARN notsup SKIPPING OPTIONAL DEPENDENCY: Unsupported platform for fsevents@
1.2.9: wanted {"os":"darwin","arch":"any"} (current: {"os":"win32","arch":"x64"})

+ webpack-dev-server@3.8.0
+ babel-loader@8.0.6
+ @babel/preset-env@7.6.0
+ @babel/core@7.6.0
+ webpack-cli@3.3.8
+ webpack@4.39.3
added 675 packages from 373 contributors and audited 10225 packages in 255.567s
found 0 vulnerabilities
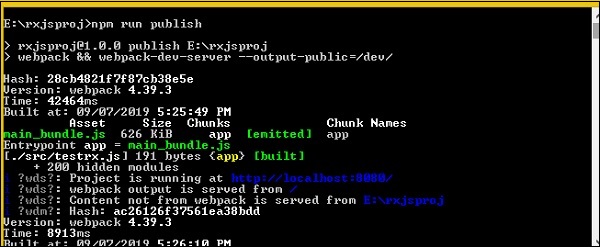
To start the server to execute our Html file, we will use webpack-server. The command “publish” in package.json will help us start as well as pack all the js files using webpack . The packed js files which are our final js file to be used is saved at the path /dev folder.
To use webpack, we need to run npm run publish command and the command is added in package.json as shown below −
Package.json
{
   "name": "rxjsproj",
   "version": "1.0.0",
   "description": "",
   "main": "index.js",
   "scripts": {
      "publish":"webpack && webpack-dev-server --output-public=/dev/",
      "test": "echo "Error: no test specified" && exit 1"
   },
   "author": "",
   "license": "ISC",
   "devDependencies": {
      "@babel/core": "^7.6.0",
      "@babel/preset-env": "^7.6.0",
      "babel-loader": "^8.0.6",
      "esm": "^3.2.25",
      "rxjs": "^6.5.3",
      "webpack": "^4.39.3",
      "webpack-cli": "^3.3.8",
      "webpack-dev-server": "^3.8.0"
   }
}
To work with webpack we must first create a file called webpack.config.js that has the configuration details for webpack to work.
The details in the file are as follows −
var path = require('path');

module.exports = {
   entry: {
      app: './src/testrx.js'
   },
   output: {
      path: path.resolve(__dirname, 'dev'),
      filename: 'main_bundle.js'
   },
   mode:'development',
   module: {
      rules: [
         {
            test:/.(js)$/,
            include: path.resolve(__dirname, 'src'),
            loader: 'babel-loader',
            query: {
               presets: ['@babel/preset-env']
            }
         }
      ]
   }
};
The structure of the file is as shown above. It starts with a path that gives the current path details.
var path = require('path'); //gives the current path
Next is module.exports object which has properties entry, output, and module. Entry is the start point. Here, we need to give the start js file we want to compile.
entry: {
   app: './src/testrx.js'
},
path.resolve(_dirname, ‘src/testrx.js’) — will look for src folder in the directory and testrx.js in that folder.
Output
output: {
   path: path.resolve(__dirname, 'dev'),
   filename: 'main_bundle.js'
},
The output is an object with path and filename details.path will hold the folder in which the compiled file will be kept and the filename will tell the name of the final file to be used in your .html file.
Module
module: {
   rules: [
      {
         test:/.(js)$/,
         include: path.resolve(__dirname, 'src'),
         loader: 'babel-loader',
         query: {
            presets: ['@babel/preset-env']
         }
      }
   ]
}
Module is object with rules details which has properties i.e. test, include, loader, query. The test will hold details of all the js file ending with .js and .jsx. It has the pattern which will look for .js at the end in the entry point given.
Include tells the folder to be used for looking at the files.
The loader uses babel-loader for compiling code.
The query has property presets which is an array with value ‘@babel/preset-env’. It will transpile the code as per the ES environment you need.
The final folder structure will be as follows −
rxjsproj/
   node_modules/
   src/
      testrx.js
   index.html
   package.json
   webpack.config.js
Run Command
npm run publish will create dev/ folder with main_bundle.js file in it. The server will be started and you can test your index.html in the browser as shown below.
Open the browser and hit the url − http://localhost:8080/
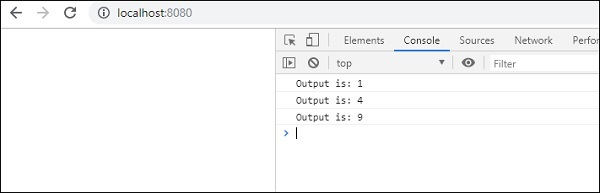
The output is shown in the console.
RxJS – Latest Updates
We are using RxJS version 6 in this tutorial. RxJS is commonly used to deal with reactive programming and used more often with Angular, ReactJS. Angular 6 loads rxjs6 by default.
RxJS version 5 was handled differently in comparison to version 6. The code will break in case you update your RxJS 5 to 6. In this chapter, we are going to see the difference in ways of handling the version update.
In case you are updating RxJS to 6 and don’t want to make the code changes, you can do that too, and will have to install the following package.
npm install --save-dev rxjs-compact
This package will take care of providing backward compatibility and old code will work fine with RxJS version 6. If you want to make the code changes that works fine with RxJS 6, here are the changes that needs to be done.
The packages for operators, observables, subject were restructured and hence, the major changes go in for imports and they are explained below.
Imports for operators
As per version 5, for operators the following import statements should be included −
import 'rxjs/add/operator/mapTo'
import 'rxjs/add/operator/take'
import 'rxjs/add/operator/tap'
import 'rxjs/add/operator/map'
In RxJS version 6 the imports will be as follows −
import {mapTo, take, tap, map} from "rxjs/operators"
Import of Methods to create Observables
As per version 5, while working with Observables, the following import methods should be included −
import "rxjs/add/observable/from";
import "rxjs/add/observable/of";
import "rxjs/add/observable/fromEvent";
import "rxjs/add/observable/interval";
In RxJS version 6 the imports will be as follows −
import {from, of, fromEvent, interval} from 'rxjs';
Import of Observables
In RxJS version 5, while working with Observables, the following import statements should be included −
import { Observable } from 'rxjs/Observable'
In RxJS version 6, the imports will be as follows −
import { Observable } from 'rxjs'
Import of Subject
In RxJS version 5, subject should be included as follows −
import { Subject} from 'rxjs/Subject'
In RxJS version 6, the imports will be as follows −
import { Subject } from 'rxjs'
How to use operators in RxJS 6?
pipe() method is available on the observable created. It is added to RxJS from version 5.5. Using pipe() now you can work on multiple operators together in sequential order. This is how the operators were used in RxJS version 5.
Example
import "rxjs/add/observable/from";
import 'rxjs/add/operator/max'

let list1 = [1, 6, 15, 10, 58, 2, 40];
from(list1).max((a,b)=>a-b).subscribe(x => console.log("The Max value is "+x));
From RxJS version 5.5 onwards, we have to use pipe() to execute the operator −
Example
import { from } from 'rxjs';
import { max } from 'rxjs/operators';

from(list1).pipe(max((a,b)=>a-b)).subscribe(x => console.log(
   "The Max value is "+x)
);
Operators Renamed
During restructuring of the packages some of the operators were renamed as they were conflicting or matching with javascript keywords. The list is as shown below −
| Operator | Renamed to |
|---|---|
| do() | tap() |
| catch() | catchError() |
| switch() | switchAll() |
| finally() | finalize() |
| throw() | throwError() |
RxJS – Observables
An observable is a function that creates an observer and attaches it to the source where values are expected from, for example, clicks, mouse events from a dom element or an Http request, etc.
Observer is an object with callback functions, that will get called when there is interaction to the Observable, i.e., the source has interacted for an example button click, Http request, etc.
We are going to discuss following topics in this chapter −
- Create Observable
- Subscribe Observable
- Execute Observable
Create Observable
The observable can be created using observable constructor and also using observable create method and by passing subscribe function as an argument to it as shown below −
testrx.js
import { Observable } from 'rxjs';

var observable = new Observable(
   function subscribe(subscriber) {
      subscriber.next("My First Observable")
   }
);
We have created an observable and added a message “My First Observable” using subscriber.next method available inside Observable.
We can also create Observable using, Observable.create() method as shown below −
testrx.js
import { Observable } from 'rxjs';
var observer = Observable.create(
   function subscribe(subscriber) {
      subscriber.next("My First Observable")
   }
);
Subscribe Observable
You can subscribe to an observable as follows −
testrx.js
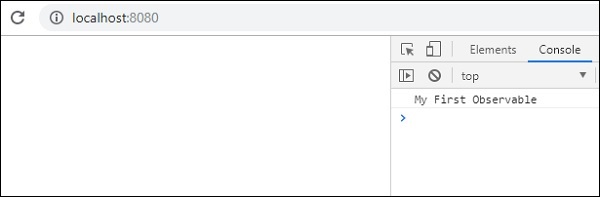
import { Observable } from 'rxjs';

var observer = new Observable(
   function subscribe(subscriber) {
      subscriber.next("My First Observable")
   }
);
observer.subscribe(x => console.log(x));
When the observer is subscribed, it will start the execution of the Observable.
This is what we see in the browser console −
Execute Observable
An observable gets executed when it is subscribed. An observer is an object with three methods that are notified,
next() − This method will send values like a number, string, object etc.
complete() − This method will not send any value and indicates the observable as completed.
error() − This method will send the error if any.
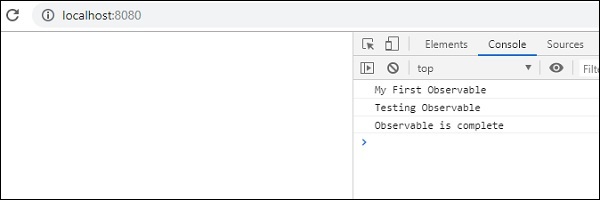
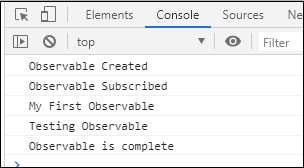
Let us create the observable with all three notifications and execute the same.
testrx.js
import { Observable } from 'rxjs';
var observer = new Observable(
   function subscribe(subscriber) {
      try {
         subscriber.next("My First Observable");
         subscriber.next("Testing Observable");
         subscriber.complete();
      } catch(e){
         subscriber.error(e);
      }
   }
);
observer.subscribe(x => console.log(x), (e)=>console.log(e),
   ()=>console.log("Observable is complete"));
In the above code, we have added, next, complete and error method.
try{
   subscriber.next("My First Observable");
   subscriber.next("Testing Observable");
   subscriber.complete();
} catch(e){
   subscriber.error(e);
}
To execute next, complete and error, we have to call the subscribe method as shown below −
observer.subscribe(x => console.log(x), (e)=>console.log(e),
   ()=>console.log("Observable is complete"));
The error method will be invoked only if there is an error.
This is the output seen in the browser −
RxJS – Operators
Operators are an important part of RxJS. An operator is a pure function that takes in observable as input and the output is also an observable.
Working with Operators
An operator is a pure function which takes in observable as input and the output is also an observable.
To work with operators we need a pipe() method.
Example of using pipe()
let obs = of(1,2,3); // an observable
obs.pipe(
   operator1(),
   operator2(),
   operator3(),
   operator3(),
)
In above example we have created a observable using of() method that takes in values 1, 2 and 3. Now on this observable you can perform different operation using any numbers of operators using pipe() method as shown above. The execution of operators will go on sequentially on the observable given.
Below is a working example −
import { of } from 'rxjs';
import { map, reduce, filter } from 'rxjs/operators';

let test1 = of(1, 2, 3, 4, 5, 6, 7, 8, 9, 10);
let case1 = test1.pipe(
   filter(x => x % 2 === 0),
   reduce((acc, one) => acc + one, 0)
)
case1.subscribe(x => console.log(x));
Output
30
In above example, we have used filter operator that, filters the even numbers and, next we have used reduce() operator that will add the even values and give the result when subscribed.
Here is a list of Observables that we are going to discuss.
- Creation
- Mathematical
- Join
- Transformation
- Filtering
- Utility
- Conditional
- Multicasting
- Error handling
Creation Operators
Following are the operators we are going to discuss in Creation operator category −
| Sr.No | Operator & Description |
|---|---|
| 1 | ajax
This operator will make an ajax request for the given URL. |
| 2 | from
This operator will create an observable from an array, an array-like object, a promise, an iterable object, or an observable-like object. |
| 3 | fromEvent
This operator will give output as an observable that is to be used on elements that emit an event for example buttons, clicks, etc. |
| 4 | fromEventPattern
This operator will create an observable from the input function that is used to register event handlers. |
| 5 | interval
This operator will create an Observable for every time for the time given.. |
| 6 | of
This operator will take in the arguments passed and convert them to observable. |
| 7 | range
This operator will create an Observable that will give you a sequence of numbers based on the range provided. |
| 8 | throwError
This operator will create an observable that will notify an error. |
| 9 | timer
This operator will create an observable that will emit the value after the timeout and the value will keep increasing after each call. |
| 10 | iif
This operator will decide which Observable will be subscribed. |
Mathematical Operators
The following are the operators we are going to discuss in the Mathematical operator category −
| Sr.No | Operator & Description |
|---|---|
| 1 | Count
The count() operator takes in an Observable with values and converts it into an Observable that will give a single value |
| 2 | Max
Max method will take in an observable with all values and return an observable with the max value |
| 3 | Min
Min method will take in an observable with all values and return an observable with the min value. |
| 4 | Reduce
In reduce operator, accumulator function is used on the input observable, and the accumulator function will return the accumulated value in the form of an observable, with an optional seed value passed to the accumulator function. The reduce() function will take in 2 arguments, one accumulator function, and second the seed value. |
Join Operators
The following are the operators we are going to discuss in the Join operator category.
| Sr.No | Operator & Description |
|---|---|
| 1 | concat
This operator will sequentially emit the Observable given as input and proceed to the next one. |
| 2 | forkJoin
This operator will be taken in an array or dict object as an input and will wait for the observable to complete and return the last values emitted from the given observable. |
| 3 | merge
This operator will take in the input observable and will emit all the values from the observable and emit one single output observable. |
| 4 | race
It will give back an observable that will be a mirror copy of the first source observable. |
Transformation Operators
The following are the operators we are going to discuss in the Transformation operator category.
| Sr.No | Operator & Description |
|---|---|
| 1 | buffer
The buffer operates on an observable and takes in argument as an observable. It will start buffering the values emitted on its original observable in an array and will emit the same when the observable taken as argument, emits. Once the observable taken as arguments emits, the buffer is reset and starts buffering again on original till the input observable emits and the same scenario repeats. |
| 2 | bufferCount
In the case of buffercount() operator, it will collect the values from the observable on which it is called and emit the same when the buffer size given to buffercount matches. |
| 3 | bufferTime
This is similar to bufferCount, so here, it will collect the values from the observable on which it is called and emit the bufferTimeSpan is done. It takes in 1 argument i.e. bufferTimeSpan. |
| 4 | bufferToggle
In the case of bufferToggle() it takes 2 arguments, openings and closingSelector. The opening arguments are subscribable or a promise to start the buffer and the second argument closingSelector is again subscribable or promise an indicator to close the buffer and emit the values collected. |
| 5 | bufferWhen
This operator will give the values in the array form, it takes in one argument as a function that will decide when to close, emit and reset the buffer. |
| 6 | expand
The expand operator takes in a function as an argument which is applied on the source observable recursively and also on the output observable. The final value is an observable. |
| 7 | groupBy
In groupBy operator, the output is grouped based on a specific condition and these group items are emitted as GroupedObservable. |
| 8 | map
In the case of map operator, a project function is applied on each value on the source Observable and the same output is emitted as an Observable. |
| 9 | mapTo
A constant value is given as output along with the Observable every time the source Observable emits a value. |
| 10 | mergeMap
In the case of mergeMap operator, a project function is applied on each source value and the output of it is merged with the output Observable. |
| 11 | switchMap
In the case of switchMap operator, a project function is applied on each source value and the output of it is merged with the output Observable, and the value given is the most recent projected Observable. |
| 12 | window
It takes an argument windowboundaries which is an observable and gives back a nested observable whenever the given windowboundaries emits |
Filtering Operators
The following are the operators we are going to discuss in the filtering operator category.
| Sr.No | Operator & Description |
|---|---|
| 1 | debounce
A value emitted from the source Observable after a while and the emission is determined by another input given as Observable or promise. |
| 2 | debounceTime
It will emit value from the source observable only after the time is complete. |
| 3 | distinct
This operator will give all the values from the source observable that are distinct when compared with the previous value. |
| 4 | elementAt
This operator will give a single value from the source observable based upon the index given. |
| 5 | filter
This operator will filter the values from source Observable based on the predicate function given. |
| 6 | first
This operator will give the first value emitted by the source Observable. |
| 7 | last
This operator will give the last value emitted by the source Observable. |
| 8 | ignoreElements
This operator will ignore all the values from the source Observable and only execute calls to complete or error callback functions. |
| 9 | sample
This operator will give the most recent value from the source Observable , and the output will depend upon the argument passed to it emits. |
| 10 | skip
This operator will give back an observable that will skip the first occurrence of count items taken as input. |
| 11 | throttle
This operator will output as well as ignore values from the source observable for the time determined by the input function taken as an argument and the same process will be repeated. |
Utility Operators
The following are the operators we are going to discuss in the utility operator category.
| Sr.No | Operator & Description |
|---|---|
| 1 | tap
This operator will have the output, the same as the source observable, and can be used to log the values to the user from the observable. The main value, error if any or if the task is complete. |
| 2 | delay
This operator delays the values emitted from the source Observable based on the timeout given. |
| 3 | delayWhen
This operator delays the values emitted from the source Observable based on the timeout from another observable taken as input. |
| 4 | observeOn
This operator based on the input scheduler will reemit the notifications from the source Observable. |
| 5 | subscribeOn
This operator helps to asynchronous subscribes to the source Observable based on the scheduler taken as input. |
| 6 | timeInterval
This operator will return an object which contains current value and the time elapsed between the current and previous value that is calculated using scheduler input taken. |
| 7 | timestamp
Returns the timestamp along with the value emitted from source Observable which tells about the time when the value was emitted. |
| 8 | timeout
This operator will throw an error if the source Observable does not emit a value after the given timeout. |
| 9 | toArray
Accumulates all the source value from the Observable and outputs them as an array when the source completes. |
Conditional Operators
The following are the operators we are going to discuss in the conditional operator category.
| Sr.No | Operator & Description |
|---|---|
| 1 | defaultIfEmpty
This operator will return a default value if the source observable is empty. |
| 2 | every
It will return an Observable based on the input function satisfies the condition on each of the value on source Observable. |
| 3 | find
This will return the observable when the first value of the source Observable satisfies the condition for the predicate function taken as input. |
| 4 | findIndex
This operator based on the input scheduler will reemit the notifications from the source Observable. |
| 5 | isEmpty
This operator will give the output as true if the input observable goes for complete callback without emitting any values and false if the input observable emits any values. |
Multicasting Operators
The following are the operators we are going to discuss in the multicasting operator category..
| Sr.No | Operator & Description |
|---|---|
| 1 | multicast
A multicast operator shares the single subscription created with other subscribers. The params that multicast takes in, is a subject or a factory method that returns a ConnectableObservable that has connect() method. To subscribe, connect() method has to be called. |
| 2 | publish
This operator gives back ConnectableObservable and needs to use connect() method to subscribe to the observables. |
| 3 | publishBehavior
publishBehaviour make use of BehaviourSubject, and returns ConnectableObservable. The connect() method has to be used to subscribe to the observable created. |
| 4 | publishLast
publishBehaviour make use of AsyncSubject, and returns back ConnectableObservable. The connect() method has to be used to subscribe to the observable created. |
| 5 | publishReplay
publishReplay make use of behaviour subject wherein it can buffer the values and replay the same to the new subscribers and returns ConnectableObservable. The connect() method has to be used to subscribe to the observable created. |
| 6 | share
It is an alias for mutlicast() operator with the only difference is that you don’t have to called connect () method manually to start the subscription. |
Error Handling Operators
The following are the operators we are going to discuss in error handling operator category.
| Sr.No | Operator & Description |
|---|---|
| 1 | catchError
This operator takes care of catching errors on the source Observable by returning a new Observable or an error. |
| 2 | retry
This operator will take care of retrying back on the source Observable if there is error and the retry will be done based on the input count given. |
RxJS – Working with Subscription
When the observable is created, to execute the observable we need to subscribe to it.
count() operator
Here, is a simple example of how to subscribe to an observable.
Example 1
import { of } from 'rxjs';
import { count } from 'rxjs/operators';

let all_nums = of(1, 7, 5, 10, 10, 20);
let final_val = all_nums.pipe(count());
final_val.subscribe(x => console.log("The count is "+x));
Output
The count is 6
The subscription has one method called unsubscribe(). A call to unsubscribe() method will remove all the resources used for that observable i.e. the observable will get canceled. Here, is a working example of using unsubscribe() method.
Example 2
import { of } from 'rxjs';
import { count } from 'rxjs/operators';

let all_nums = of(1, 7, 5, 10, 10, 20);
let final_val = all_nums.pipe(count());
let test = final_val.subscribe(x => console.log("The count is "+x));
test.unsubscribe();
The subscription is stored in the variable test. We have used test.unsubscribe() the observable.
Output
The count is 6
RxJS – Working with Subjects
A subject is an observable that can multicast i.e. talk to many observers. Consider a button with an event listener, the function attached to the event using add listener is called every time the user clicks on the button similar functionality goes for subject too.
We are going to discuss the following topics in this chapter −
- Create a subject
- What is the Difference between Observable and Subject?
- Behaviour Subject
- Replay Subject
- AsyncSubject
Create a subject
To work with subject, we need to import Subject as shown below −
import { Subject } from 'rxjs';
You can create a subject object as follows −
const subject_test = new Subject();
The object is an observer that has three methods −
- next(v)
- error(e)
- complete()
Subscribe to a Subject
You can create multiple subscription on the subject as shown below −
subject_test.subscribe({
   next: (v) => console.log(`From Subject : ${v}`)
});
subject_test.subscribe({
   next: (v) => console.log(`From Subject: ${v}`)
});
The subscription is registered to the subject object just like addlistener we discussed earlier.
Passing Data to Subject
You can pass data to the subject created using the next() method.
subject_test.next("A");
The data will be passed to all the subscription added on the subject.
Example
Here, is a working example of the subject −
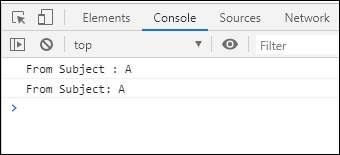
import { Subject } from 'rxjs';

const subject_test = new Subject();

subject_test.subscribe({
   next: (v) => console.log(`From Subject : ${v}`)
});
subject_test.subscribe({
   next: (v) => console.log(`From Subject: ${v}`)
});
subject_test.next("A");
subject_test.next("B");
The subject_test object is created by calling a new Subject(). The subject_test object has reference to next(), error() and complete() methods. The output of the above example is shown below −
Output

We can use complete() method to stop the subject execution as shown below.
Example
import { Subject } from 'rxjs';

const subject_test = new Subject();

subject_test.subscribe({
   next: (v) => console.log(`From Subject : ${v}`)
});
subject_test.subscribe({
   next: (v) => console.log(`From Subject: ${v}`)
});
subject_test.next("A");
subject_test.complete();
subject_test.next("B");
Once we call complete the next method called later is not invoked.
Output
Let us now see how to call error () method.
Example
Below is a working example −
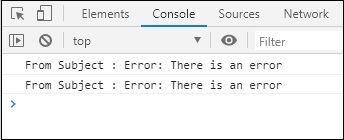
import { Subject } from 'rxjs';

const subject_test = new Subject();

subject_test.subscribe({
   error: (e) => console.log(`From Subject : ${e}`)
});
subject_test.subscribe({
   error: (e) => console.log(`From Subject : ${e}`)
});
subject_test.error(new Error("There is an error"));
Output
What is the Difference between Observable and Subject?
An observable will talk one to one, to the subscriber. Anytime you subscribe to the observable the execution will start from scratch. Take an Http call made using ajax, and 2 subscribers calling the observable. You will see 2 HttpHttp requests in the browser network tab.
Example
Here is a working example of same −
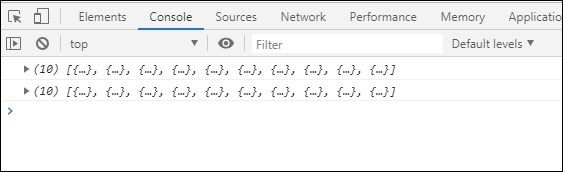
import { ajax } from 'rxjs/ajax';
import { map } from 'rxjs/operators';

let final_val = ajax('https://jsonplaceholder.typicode.com/users').pipe(map(e => e.response));
let subscriber1 = final_val.subscribe(a => console.log(a));
let subscriber2 = final_val.subscribe(a => console.log(a));
Output

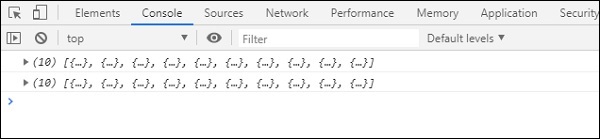
Now, here the problem is, we want the same data to be shared, but not, at the cost of 2 Http calls. We want to make one Http call and share the data between subscribers.
This will be possible using Subjects. It is an observable that can multicast i.e. talk to many observers. It can share the value between subscribers.
Example
Here is a working example using Subjects −
import { Subject } from 'rxjs';
import { ajax } from 'rxjs/ajax';
import { map } from 'rxjs/operators';

const subject_test = new Subject();

subject_test.subscribe({
   next: (v) => console.log(v)
});
subject_test.subscribe({
   next: (v) => console.log(v)
});

let final_val = ajax('https://jsonplaceholder.typicode.com/users').pipe(map(e => e.response));
let subscriber = final_val.subscribe(subject_test);
Output
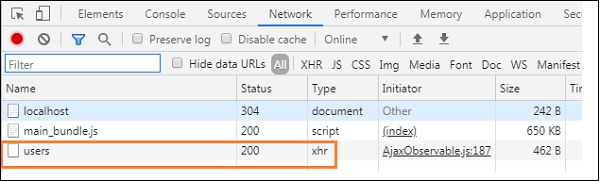
Now you can see only one Http call and the same data is shared between the subscribers called.
Behaviour Subject
Behaviour subject will give you the latest value when called.
You can create behaviour subject as shown below −
import { BehaviorSubject } from 'rxjs';
const subject = new BehaviorSubject("Testing Behaviour Subject");
// initialized the behaviour subject with value:Testing Behaviour Subject
Example
Here is a working example to use Behaviour Subject −
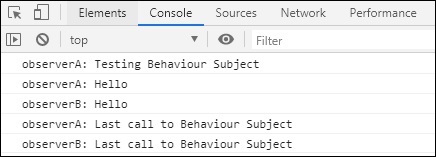
import { BehaviorSubject } from 'rxjs';
const behavior_subject = new BehaviorSubject("Testing Behaviour Subject");
// 0 is the initial value

behavior_subject.subscribe({
   next: (v) => console.log(`observerA: ${v}`)
});

behavior_subject.next("Hello");
behavior_subject.subscribe({
   next: (v) => console.log(`observerB: ${v}`)
});
behavior_subject.next("Last call to Behaviour Subject");
Output
Replay Subject
A replaysubject is similar to behaviour subject, wherein, it can buffer the values and replay the same to the new subscribers.
Example
Here is a working example of replay subject −
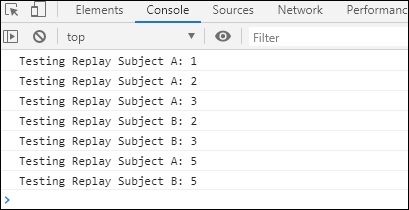
import { ReplaySubject } from 'rxjs';
const replay_subject = new ReplaySubject(2);
// buffer 2 values but new subscribers

replay_subject.subscribe({
   next: (v) => console.log(`Testing Replay Subject A: ${v}`)
});

replay_subject.next(1);
replay_subject.next(2);
replay_subject.next(3);
replay_subject.subscribe({
   next: (v) => console.log(`Testing Replay Subject B: ${v}`)
});

replay_subject.next(5);
The buffer value used is 2 on the replay subject. So the last two values will be buffered and used for the new subscribers called.
Output
AsyncSubject
In the case of AsyncSubject the last value called is passed to the subscriber and it will be done only after complete() method is called.
Example
Here is a working example of the same −
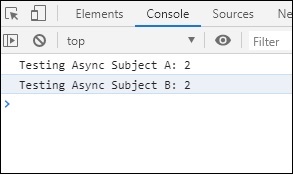
import { AsyncSubject } from 'rxjs';

const async_subject = new AsyncSubject();

async_subject.subscribe({
   next: (v) => console.log(`Testing Async Subject A: ${v}`)
});

async_subject.next(1);
async_subject.next(2);
async_subject.complete();
async_subject.subscribe({
   next: (v) => console.log(`Testing Async Subject B: ${v}`)
});
Here, before complete is called the last value passed to the subject is 2 and the same it given to the subscribers.
Output
RxJS – Working with Scheduler
A scheduler controls the execution of when the subscription has to start and notified.
To make use of scheduler we need the following −
import { Observable, asyncScheduler } from 'rxjs';
import { observeOn } from 'rxjs/operators';
Here is a working example, wherein, we will use the scheduler that will decide the execution.
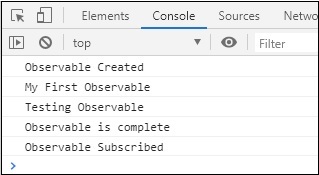
Example
import { Observable, asyncScheduler } from 'rxjs';
import { observeOn } from 'rxjs/operators';

var observable = new Observable(function subscribe(subscriber) {
   subscriber.next("My First Observable");
   subscriber.next("Testing Observable");
   subscriber.complete();
}).pipe(
   observeOn(asyncScheduler)
);
console.log("Observable Created");
observable.subscribe(
   x => console.log(x),
   (e)=>console.log(e),
   ()=>console.log("Observable is complete")
);

console.log('Observable Subscribed');
Output
Without scheduler the output would have been as shown below −
Working with RxJS & Angular
In this chapter, we will see how to use RxJs with Angular. We will not get into the installation process for Angular here, to know about Angular Installation refer this link −https://www.tutorialspoint.com/angular7/angular7_environment_setup.htm
We will directly work on an example, where will use Ajax from RxJS to load data.
Example
app.component.ts
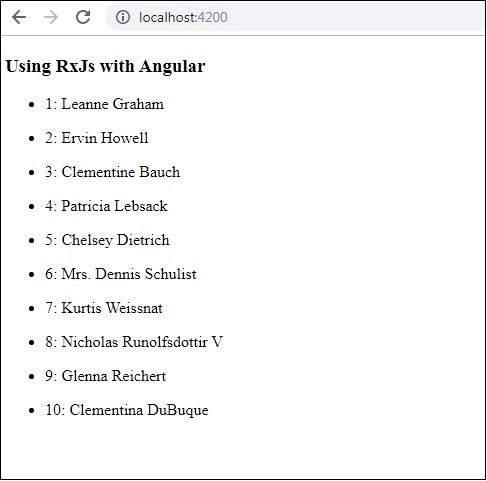
import { Component } from '@angular/core';
import { environment } from './../environments/environment';
import { ajax } from 'rxjs/ajax';
import { map } from 'rxjs/operators'

@Component({
   selector: 'app-root',
   templateUrl: './app.component.html',
   styleUrls: ['./app.component.css']
})
export class AppComponent {
   title = '';
   data;
   constructor() {
      this.data = "";
      this.title = "Using RxJs with Angular";
      let a = this.getData();
   }
   getData() {
      const response =
      ajax('https://jsonplaceholder.typicode.com/users')
         .pipe(map(e => e.response));
      response.subscribe(res => {
         console.log(res);
         this.data = res;
      });
   }
}
app.component.html
<div>
   <h3>{{title}}</h3>
   <ul *ngFor="let i of data">
      <li>{{i.id}}: {{i.name}}</li>
   </ul>
</div>

<router-outlet></router-outlet>
We have used ajax from RxJS that will load data from this url − https://jsonplaceholder.typicode.com/users.
When you compile the display is as shown below −
Working with RxJS & ReactJS
In this chapter, we will see how to use RxJs with ReactJS. We will not get into the installation process for Reactjs here, to know about ReactJS Installation refer this link: https://www.yoursite.com/reactjs/reactjs_environment_setup.htm
Example
We will directly work on an example below, where will use Ajax from RxJS to load data.
index.js
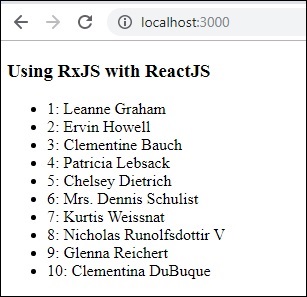
import React, { Component } from "react";
import ReactDOM from "react-dom";
import { ajax } from 'rxjs/ajax';
import { map } from 'rxjs/operators';
class App extends Component {
   constructor() {
      super();
      this.state = { data: [] };
   }
   componentDidMount() {
      const response = ajax('https://jsonplaceholder.typicode.com/users').pipe(map(e => e.response));
      response.subscribe(res => {
         this.setState({ data: res });
      });
   }
   render() {
      return (
         <div>
            <h3>Using RxJS with ReactJS</h3>
            <ul>
               {this.state.data.map(el => (
                  <li>
                     {el.id}: {el.name}
                  </li>
               ))}
            </ul>
         </div>
      );
   }
}
ReactDOM.render(<App />, document.getElementById("root"));
index.html
<!DOCTYPE html>
<html>
   <head>
      <meta charset = "UTF-8" />
      <title>ReactJS Demo</title>
   <head>
   <body>
      <div id = "root"></div>
   </body>
</html>
We have used ajax from RxJS that will load data from this Url − https://jsonplaceholder.typicode.com/users.
When you compile, the display is as shown below −
Disclosure: We are a professional review site that receives compensation from the companies whose products we review. We are independently owned and we have spent time and effort doing our best to offer you the most relevant and accurate information. All the "customer reviews" are posted by real webmasters (hosting customers) and we're not responsable for their opinions. Purchasing any service from the hosting companies listed on our site is your solely decision.
Statistics Panel
| Stats Panel | Last 24h | Last Month | Total |
| Articles | 0 | 88 | 5166 |
| News | 0 | 597 | 18356 |
| Hosting Sites | 0 | 1 | 2452 |
| Reviews | 0 | 26 | 1807 |
| Coupons | 0 | 0 | 561 |